
“Simplicity is the ultimate sophistication” – and nowhere is that truer than with seamless microcement floors, which deliver uninterrupted lines, easy maintenance, and a tailored look from hallway to wet room.
Style-Driven Finish Choices for Microcement Floors
Set the mood first: picture a single moodboard and a lifestyle shot that nail the vibe you’re after — calm (soft, airy neutrals), industrial (cool greys, crisp edges), or warm (earthy tones with tactile depth). Then define a tight “finish recipe” so your microcement reads intentional, not improvised: colour family (warm greige, cool grey, clay/terracotta, charcoal), texture grade (fine, medium, coarse), and sheen (matt or satin). Lock in the detailing too — edges with shadow gaps or slim trims, door thresholds in matching microcement or brushed metal, stairs with continuous wrap and anti-slip nosings, and a clean wall-to-floor wrap up 100–150 mm for that gallery finish. If you’re running underfloor heating, go for fine textures as they visually mask minor hairlines better than coarser blends, keeping the surface reading seamless and calm.
Recommended default for most homes: Fine texture, matt, warm greige — it feels soft and minimal, plays nicely with timber, stone, and black accents, and carries a practical R9–R10 slip rating. If you want a bolder read, step up to medium texture, matt, clay/terracotta for an earthy, tactile look in hardworking spaces like kitchens. For brutalist purists, coarse texture, matt, charcoal gives a rugged punch in porches and utilities. Keep it user-proof with these quick checks: – Colour family that flatters your light levels (north light loves warm greige; south light can handle cool grey). – Texture grade to balance feel vs maintenance (fine = refined, coarse = grip). – Sheen that hides wear (matt is forgiving; satin is cleaner, modern). – Details that make it look expensive: tight thresholds, wrapped risers, consistent skirting strategy.
Where Seamless Floors Work Best: Room-by-Room Wins
Microcement seamless floors shine when you match the finish to the space and your lifestyle. Keep it practical: pick the right slip resistance, plan wear zones, and think about comfort and acoustics where echo can get annoying. Quick-fire guidance below, no fluff—just the bits that save you callbacks and regrets.
- Kitchen — Go heat-safe, easy wipe-down, and specify R10+ for daily spills. Mini use-case: 25 m² kitchen with a satin sealer for easy cleaning and an integrated upstand behind the hob to stop splatter lines. Tip: Do use felt pads under stools; Don’t drag cast-iron pans across the floor.
- Bathroom / Wet room — Always install a full waterproofing system under microcement; specify R11 in showers. Wall-to-floor continuity removes grout lines and mould traps. Do fit a gentle fall to drain; Don’t skip silicone at transitions.
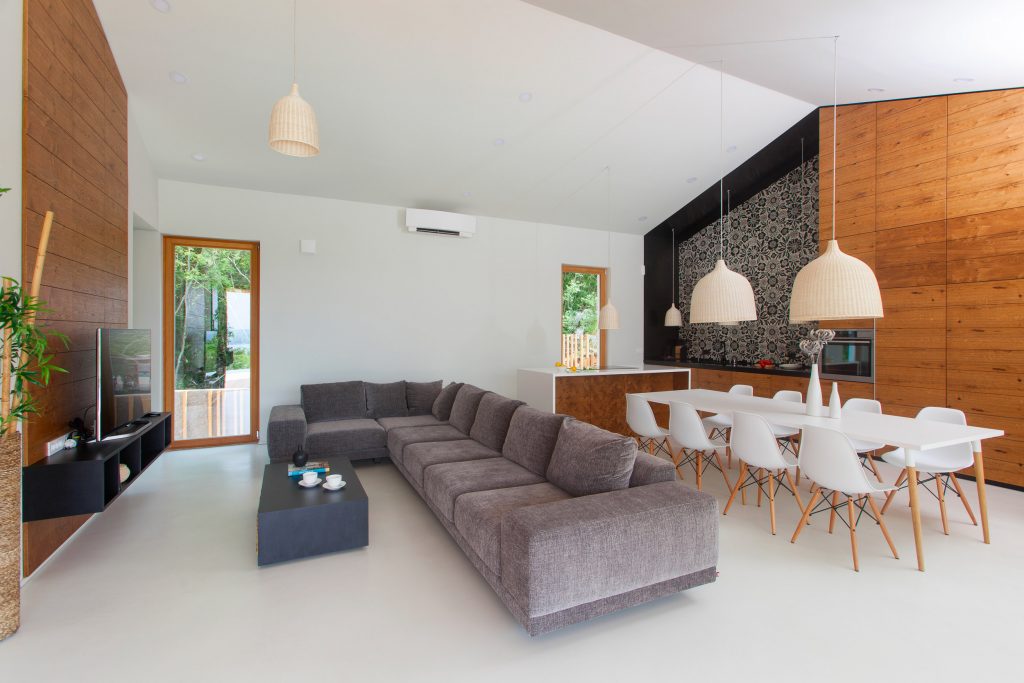
- Living room — Aim for large, calm planes and pre-plan rug zones to avoid odd wear patches. If the space is echoey, add acoustic underlay beneath the build-up for softer footfall and better TV sound clarity.
- Hallway / Stairs — This is a high-wear area: choose a medium texture for grip and durability. Include a clear nosing detail (simple square edge with sealed return) for safe, crisp lines. Do place a coarse mat at the door; Don’t let grit grind in—daily sweep wins.
- Commercial corner — Set maintenance intervals (light polish every 3–6 months, reseal annually in heavy traffic). Opt for a darker mid-tone to hide scuffs and keep the space looking sharp between cleans.
Pet-friendly note: choose a scratch-resistant sealer, keep R10–R11 slip ratings in wet zones for zoomies, and add rubber-backed runners where paws launch. Comfort cue: in minimalist rooms, a thin acoustic layer under the microcement helps tame clicky footsteps without losing that sleek, continuous look.
Installation Essentials: Subfloors, Joints, and Curing That Last
Prep is everything. If the substrate isn’t right, nothing else matters. Check flatness, cracks, and moisture before you even open a tub. You want moisture below 75% RH or you’ll need a DPM to lock it down. Chase and stabilise cracks, then stitch or fill with a compatible resin—don’t just skim and hope. Keep tolerances tight: a proper levelling compound saves you grief later. Honour movement where the building tells you to: structural joints must be continued through the finish, and use discreet shadow gaps at perimeters so the surface can breathe. For UFH, do a controlled heat-up and cool-down cycle before coating; cap the surface temperature at ~27°C during and after install to avoid shock or microcracking. Experts’ advice: log RH readings, slab temps, and heating curves—if it isn’t written down, it didn’t happen.
Run a lean, repeatable coat schedule: primer, base, finish, and 2x sealer. Keep total build to 2–3 mm and respect cure times between passes—typically 3–6 hours per coat depending on spec and climate. One highly versatile pick is a polymer‑modified cement system (2–3 mm): primer + base + micro + two coats of sealer. It offers high flex/impact resistance, suits most homes, and works in wet areas when you follow the manufacturer’s sealer system. Want ultra-thin over timber or existing tiles? Consider a ready-to-use paste, but choose based on site movement and wear class. If you expect heavier traffic, a microconcrete with mesh base (3–4 mm) gives a beefier feel and more texture. Experts’ advice: match system to substrate first, aesthetics second—pretty finishes don’t fix bad bases.
Nail the curing milestones and protect the surface like you mean it. Allow light foot traffic at ~24 hours, place furniture after 48–72 hours with pads only, and wait a full 7 days for chemical resistance before cleaners, rugs, or rolling loads—always confirm with the manufacturer’s data sheet. Keep UFH low and steady during cure, avoid standing water, and don’t trap moisture with plastic. The pay-off? A tight, durable finish that wears in, not out—because you respected substrate prep, joint strategy, a disciplined 2–3 mm build, and a patient cure.
Budgeting and Scheduling Your Seamless Floor in the UK
Let’s talk straight: a quality install typically lands between £80–£180 per m² in the UK, and that’s before any substrate repairs push the number up. What moves the dial? Area size (bigger jobs spread fixed costs), complexity like stairs, upstands and tricky junctions, custom colour matching, the sealer system you choose (PU matt vs satin, anti-slip, high-build), plus travel and site constraints. For an honest quote, brief like a pro: share accurate m², drawings or photos, the substrate type (screed, timber, tiles), any moisture test data, preferred colour and sheen, a clear room list, and UFH details (zones, manifolds, commissioning). Expect an itemised breakdown that reads something like: site survey & moisture testing (BS 8203 hygrometer, ~£150), crack repair & fibre-reinforced levelling (allow 3–5 mm average, ~£600–£1,000), primer + mesh (~£300), base and finish coats at 2–3 mm (~£3,200–£5,200 for 40 m²), PU sealer 2–3 coats (~£400–£700), stairs per tread (~£80–£120), and travel/masking/protection (~£200–£400). Total on a 40 m² ground floor usually lands around £4,850–£7,570, but undefined quirks on site can nudge it either way.
Scheduling needs the same realism. Build in lead times for samples (approve colour/texture first), site prep (levelling, crack stitching, priming), and the drying gaps between coats and before furniture returns. A typical installation is 4–6 on‑site days plus cure time, with longer pauses if moisture is high or if UFH needs a proper heat-cycle. Want a clean run? Lock down access, stable temperature and RH, power, and clear rooms; confirm joinery and plumbing are finished, and keep other trades off the surface until the final sealer has hardened. If you’re comparing quotes, ask installers to tailor the “sample table” lines to your project so you’re judging like for like—same systems, same thickness, same sealer spec, same warranty.
Care, Repairs, and Lifespan: Keeping It Beautiful
One rule that saves your finish: use a pH‑neutral cleaner and nothing else—no steam mops, no abrasives, no miracle potions from the internet. Treat the surface like a luxury paint job: mats at entrances catch grit before it behaves like sandpaper, felt pads under furniture stop micro-scratches, and always lift, don’t drag. Plan a reseal every 3–5 years (busy households sooner), and book it for a low‑traffic season so cure times don’t wreck your routine. For small scars, fill a chip with colour‑matched paste and spot re‑seal; if you see a structural crack that moves, call a professional. Prefer low‑VOC sealers and, when the surface is tired, re‑top instead of replacing to cut waste and cost. Conclusion: consistent, light‑touch care keeps that seamless floor looking expensive without you spending a fortune.
Maintenance rhythm that actually works: Weekly—dry dust, then a damp mop with a pH‑neutral cleaner. Quarterly—deep clean; re‑wax if your system uses a maintenance wax. Annually—a proper inspection and touch‑ups on high‑wear zones. Every 3–5 years—a full reseal per the manufacturer; if funds are tight, refresh traffic lanes first. Conclusion: this simple cadence locks in durability, preserves the microcement finish, and keeps your seamless flooring photo‑ready with minimal effort.